system guide / windows 7
How to upgrade your Windows 7 edition using Windows Anytime Upgrade
In this tutorial we will show you how to upgrade your Windows 7 from one edition to another. It is the easiest way, since you do not have to download any files.
Since OEM licenses cannot be used for the upgrade process, you will need to use generic Windows 7 keys for the upgrade process (those keys will be provided at the right point in the tutorial) and then you will need to activate your new edition of Windows using a product key.
Please keep note that this upgrade can only go through specific paths; refer to the table below:
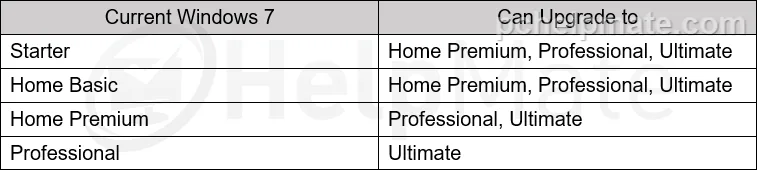
i noteIn this tutorial we will be upgrading Windows 7 Home Premium to Windows 7 Professional. All of these instructions apply to other upgrades.
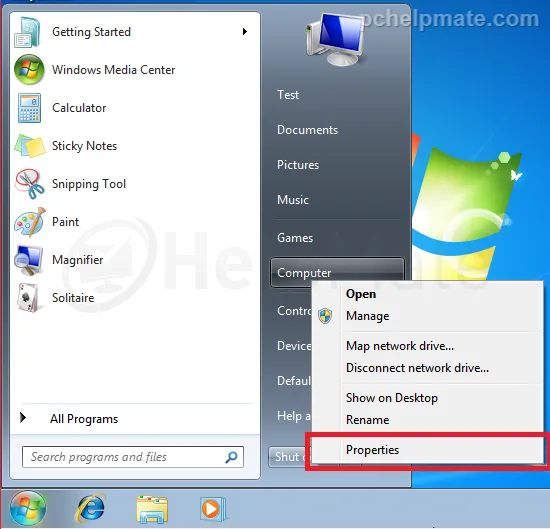
Open your “Start” menu, right click on “Computer” and select “Properties”.
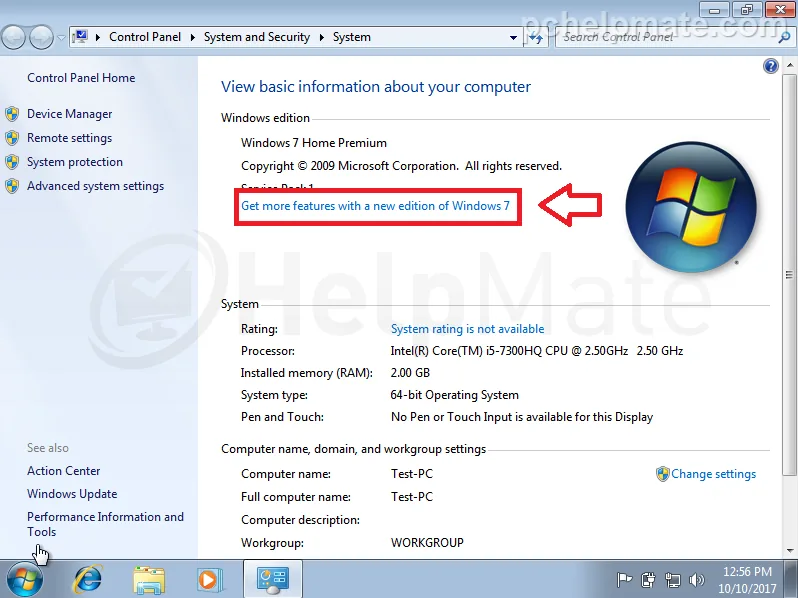
Click on “Get more features with a new edition of Windows 7”.
Click on “Enter an upgrade key”.
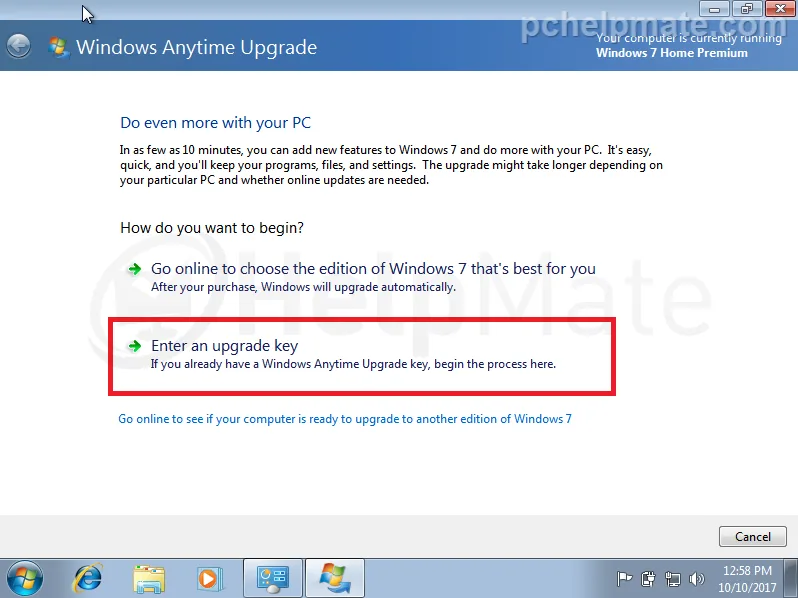
Now you need to enter the upgrade key for the edition to which you want your Windows 7 to upgrade, and click “Next”. Refer to the table below:
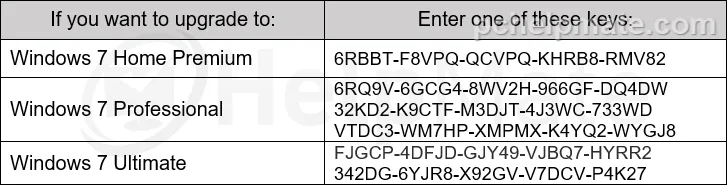
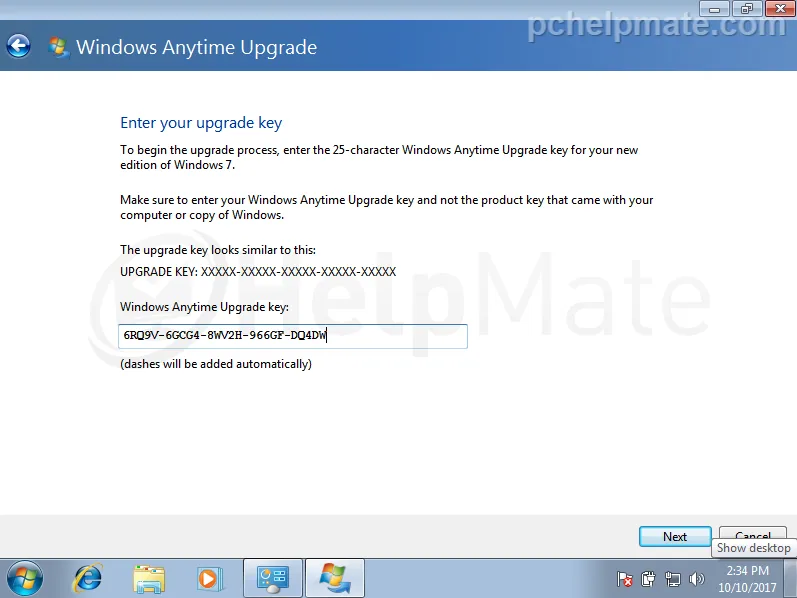
In this tutorial we are upgrading Windows 7 Home Premium to Professional.
Windows will now verify the upgrade key.
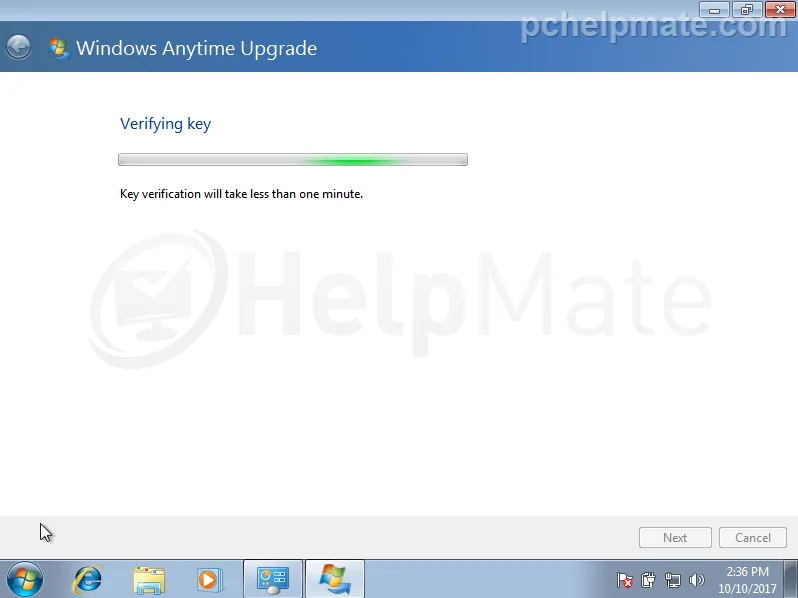
If the key didn’t work, try a different one. If it did, you will see another screen on which you need to accept the license terms.
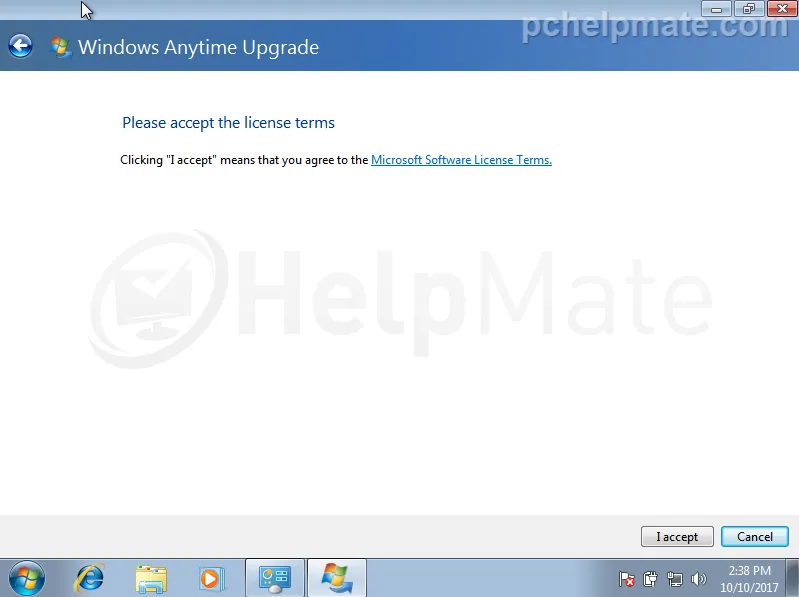
Click on “Upgrade”.
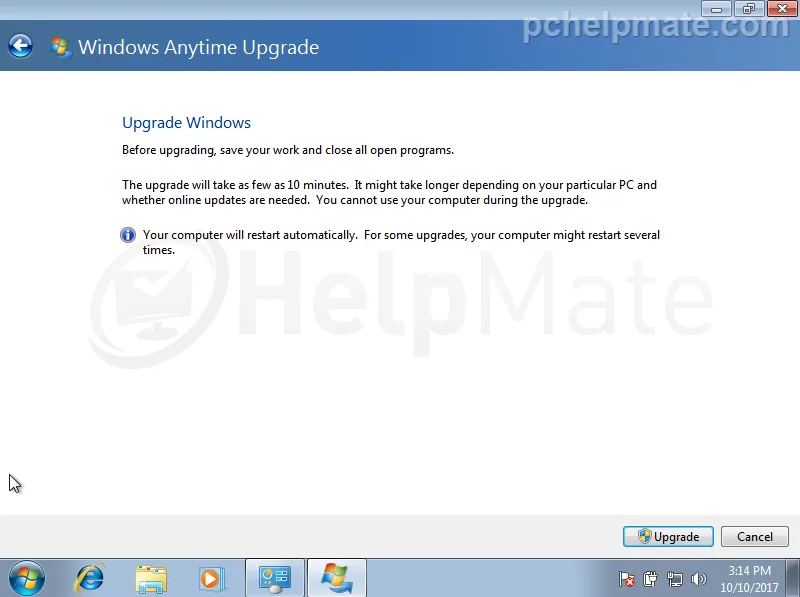
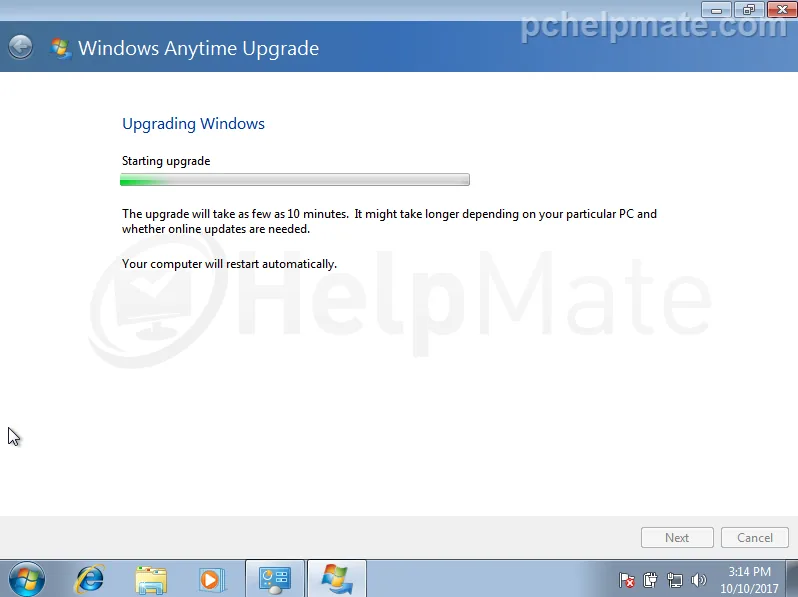
The upgrade will now start. It may take a little bit longer if it has to download updates from the internet.
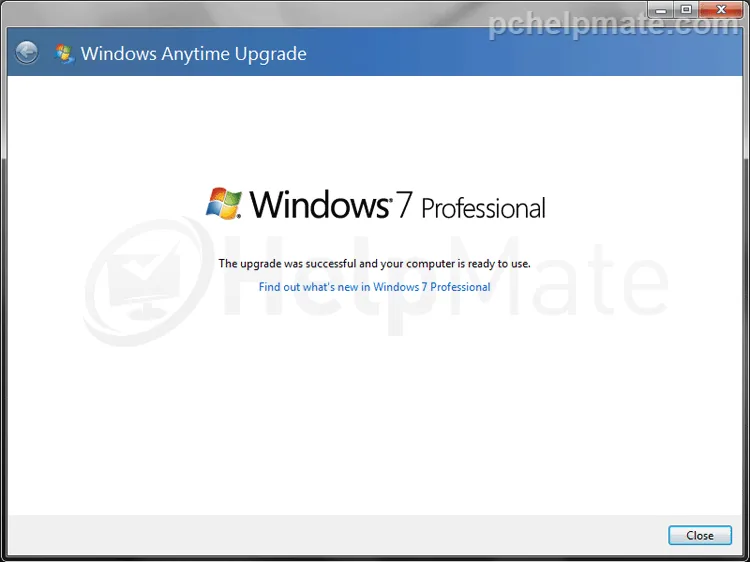
After your computer restarts you will have an upgraded edition of Windows. Now you can proceed with activation.
How to activate existing Windows 7
In this tutorial we will show you how to activate existing Windows 7 with a product key. To do this you will need:
- Windows 7
- Product key for your specific edition of Windows
In this tutorial we will be activating Windows 7 Home Premium.
Go to the Start Menu, right click on Computer and select Properties.
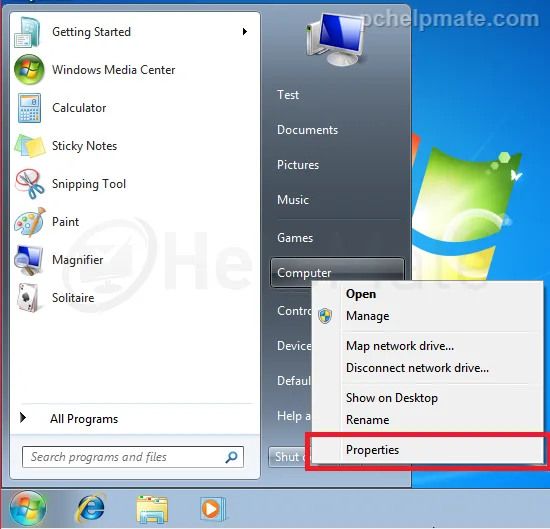
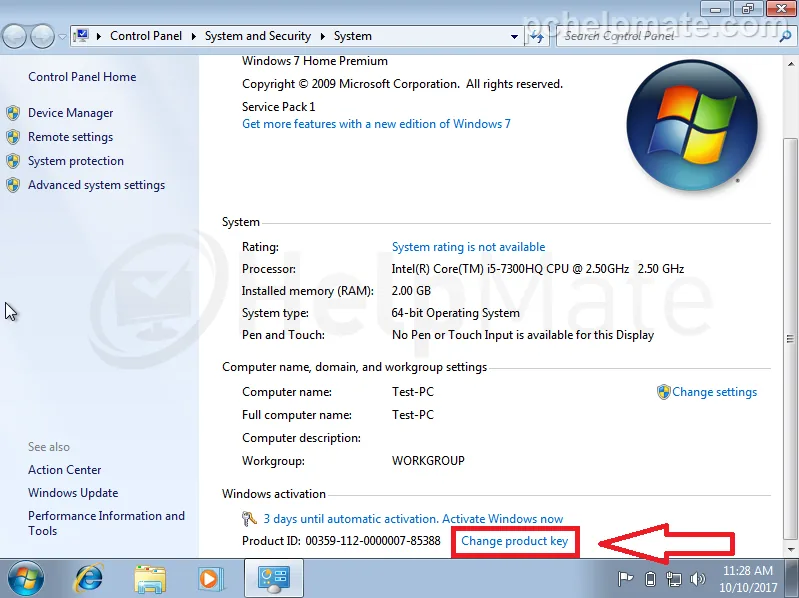
Scroll down to the bottom of this window and click on “Change product key”.
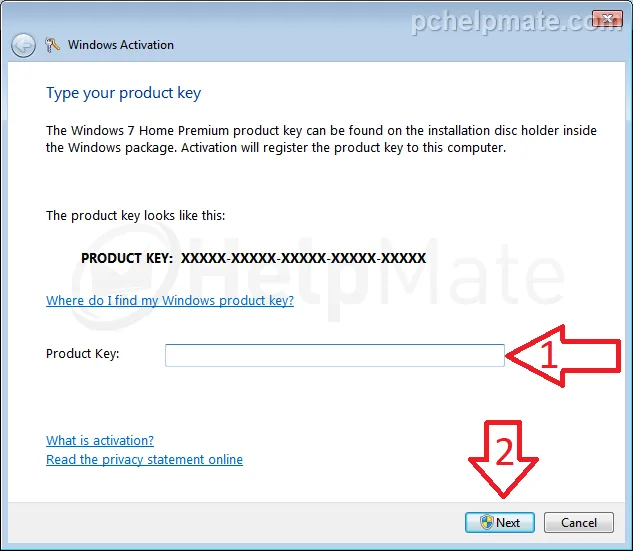
Now carefully type in the product key. Double check it and click “Next”.
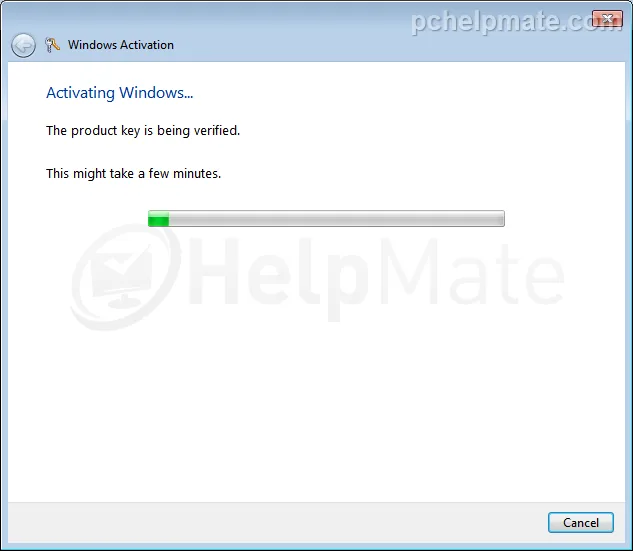
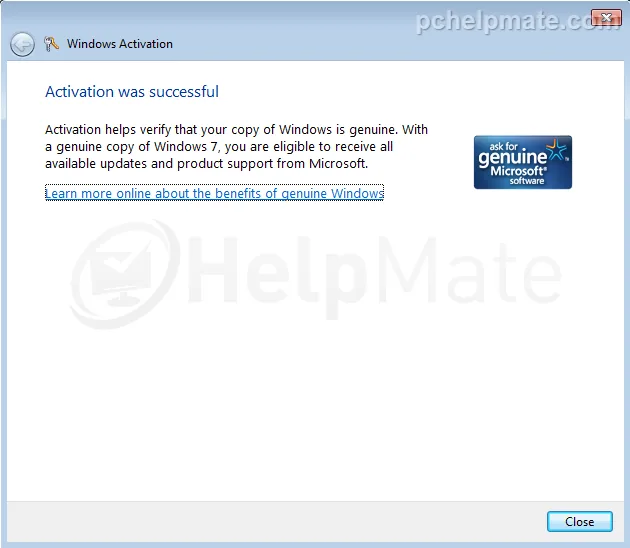
The product key will either go through online or might require phone activation. If you see the screen saying that activation is successful, that’s it: your Windows is activated.
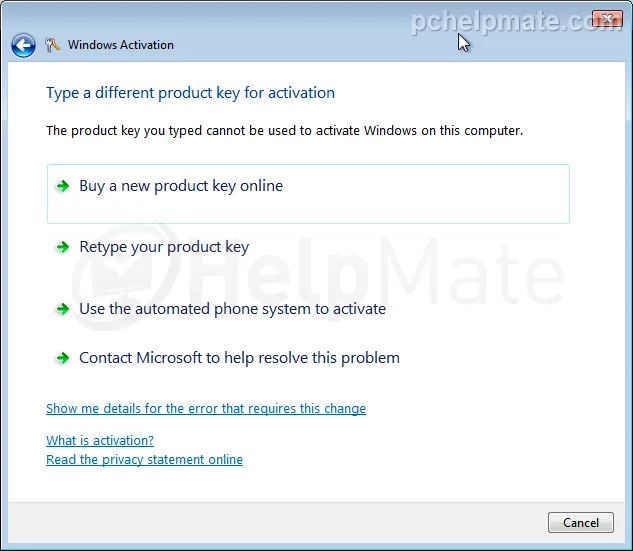
If you see this window instead, then you must continue using the automated phone system to activate.
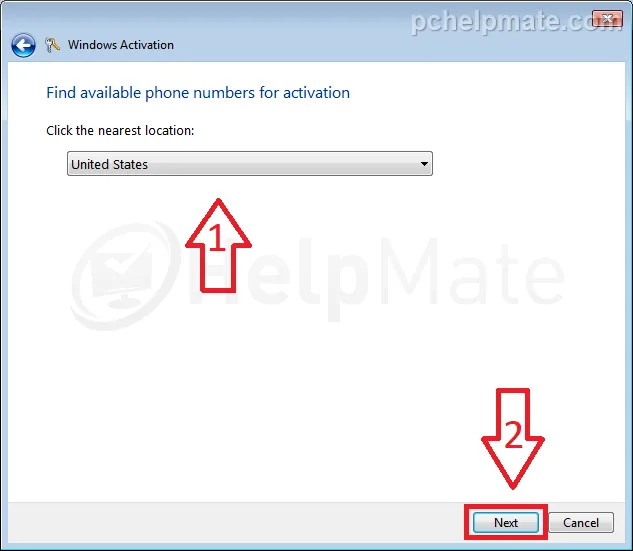
Select your country and click “Next”.
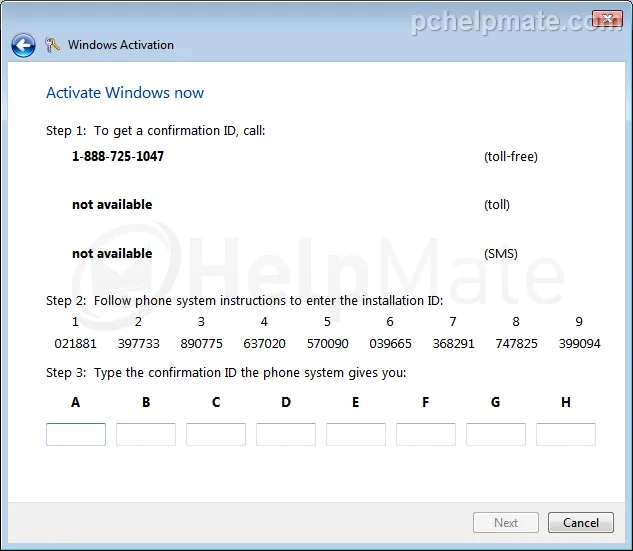
Call the toll-free number and provide the automated phone system with the installation ID.
i noteIf you will be using the mobile phone tool to which the phone system sends a link via SMS, please remember: when asked how many times you have activated this copy of Windows, say “0” (this is an error on Microsoft’s side and they still haven’t fixed it).
The system will provide you with the confirmation ID, which you need to type into the boxes from A to H. Then click “Next”.
Now you should see that activation was successful. That’s it: you have activated your Windows 7.
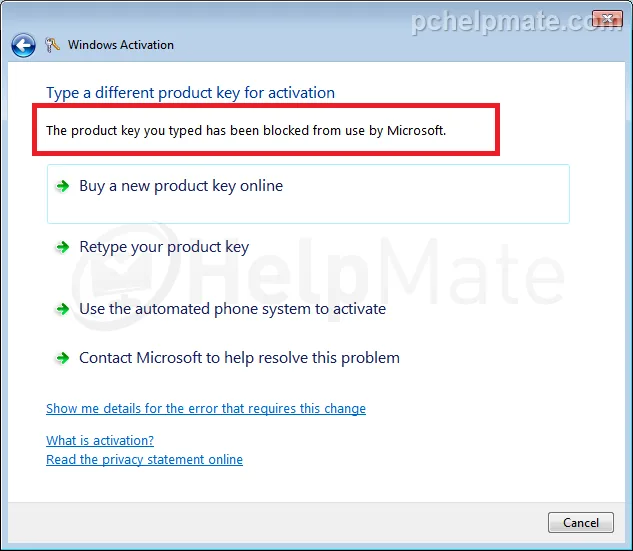
If you see this window instead, it means that the key was blocked and cannot be used to activate Windows. In this situation you may need to purchase a working key, or contact your key seller and ask for software recovery options.