
system guide / windows 7
Clean installation of Windows 7
In this tutorial we will show you how to perform a clean installation of Windows 7. This method will wipe out everything that is on this computer, so make sure to back up all valuable data before attempting installation.
To perform the clean installation you will need:
- Installation DVD or USB
After you have created the installation DVD or USB, insert it into the computer and shut it down. Now you will need to boot your computer using it. It will require entering either your BIOS setup utility or the Boot Menu by starting your computer and immediately tapping a certain button (a list of possible setup/boot menu buttons you can find here).
Booting your computer using DVD or USB:
- If you entered the BIOS setup utility, look for boot options/boot sequence and select your installation DVD or USB as the primary boot device. When you are done, exit the BIOS saving changes and reboot your computer. When you see “Press any key to start installation disc”, press any key to start the installation.
- If you entered the Boot Menu, select the DVD or USB you have created. When you see “Press any key to start installation disc”, press any key to start the installation.


Now you will see the installation screen. Select language, press Next and then “Install now”.
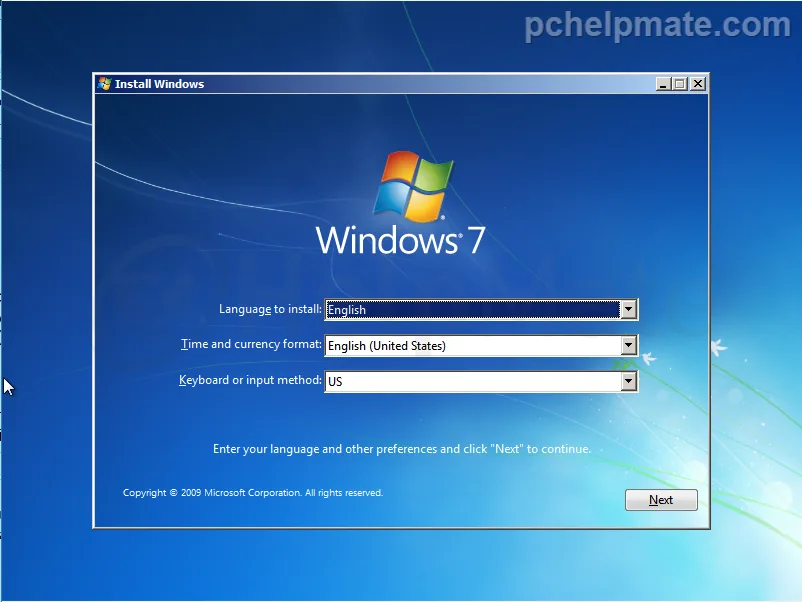
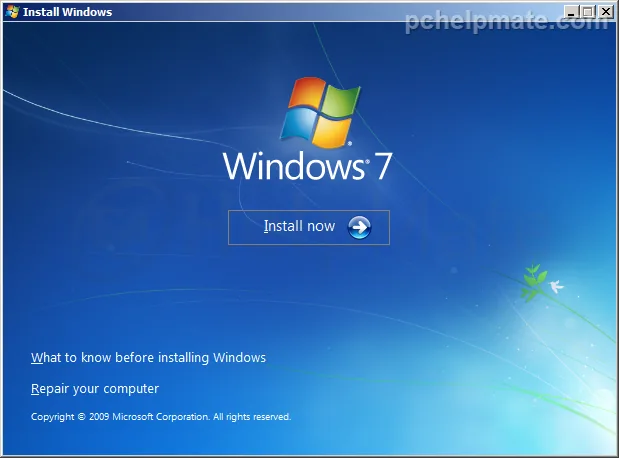
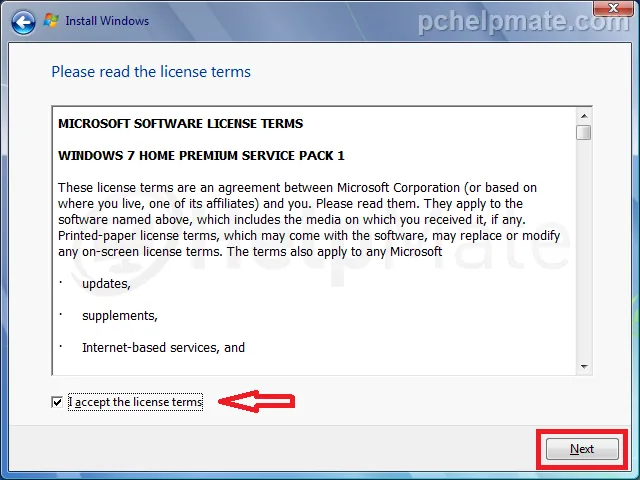
Accept the terms and press “Next”.
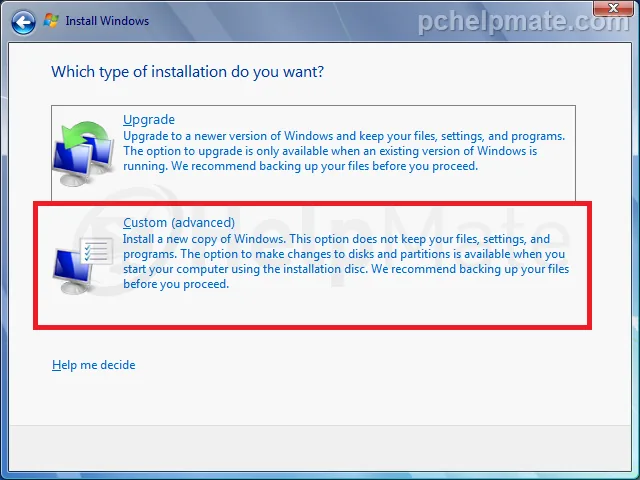
Choose Custom (Advanced).
You will now see the list of your current partitions. Click on “Drive options”.
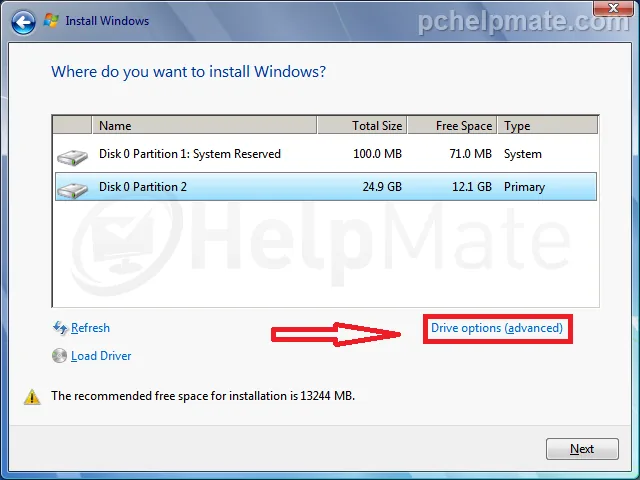
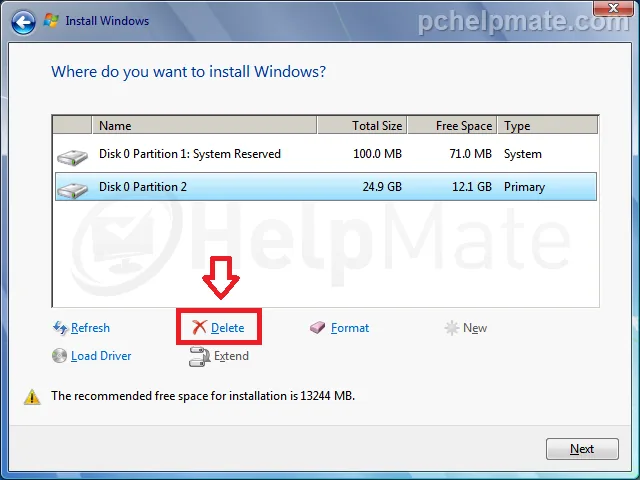
Now select each partition and press “Delete” at the bottom.
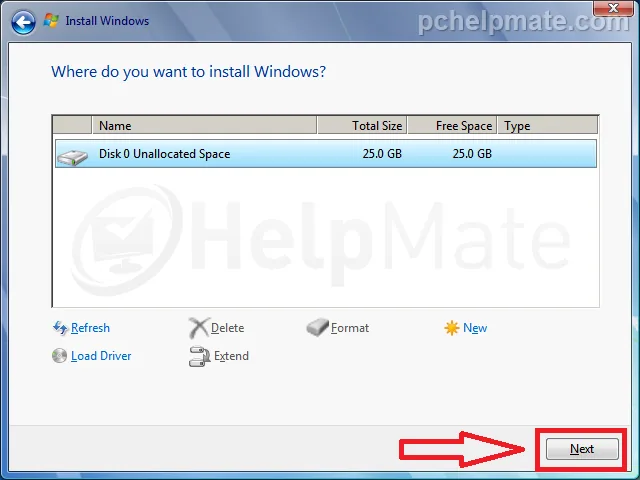
After you are done deleting partitions you should see “Disk 0 Unallocated space”. Highlight it and press “Next”.
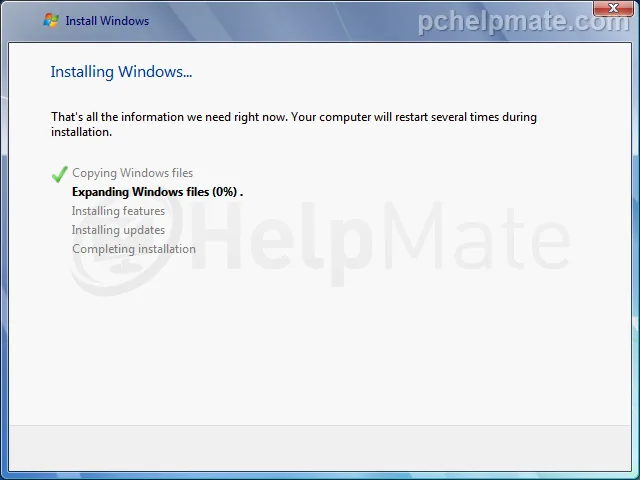
The installation will now start. It shouldn’t take longer than 1 hour, but on older computers it might take longer than that.
At the end your computer will reboot; do not press any keys, because the installation would start all over again. Please wait until you see this screen. Enter your username and press Next.
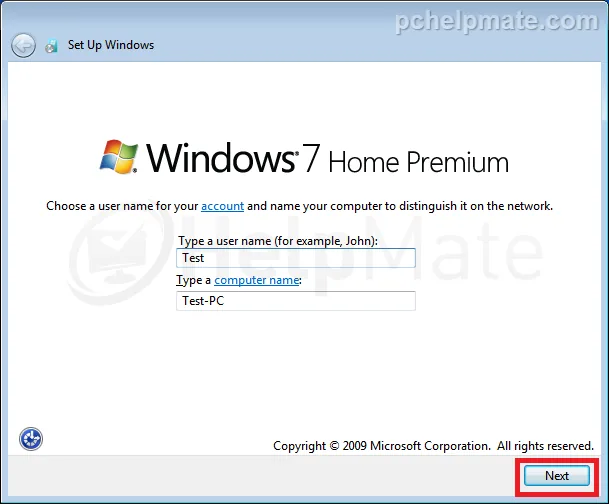
You can enter your new password, but if you do not want to have a password just click “Next”.
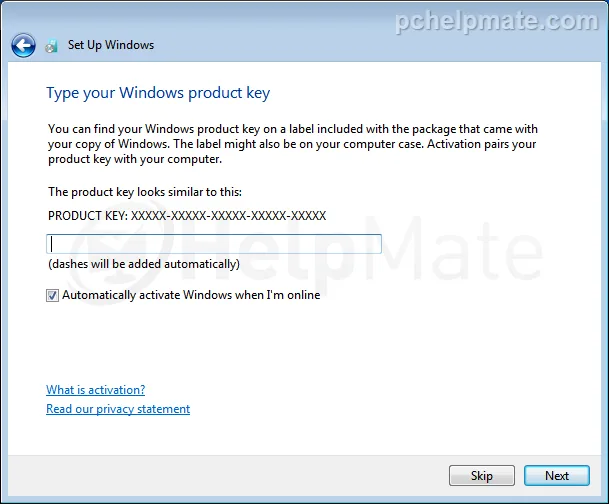
Now enter your product key and press “Next”. If you do not have access to your product key right now, you can skip for now.
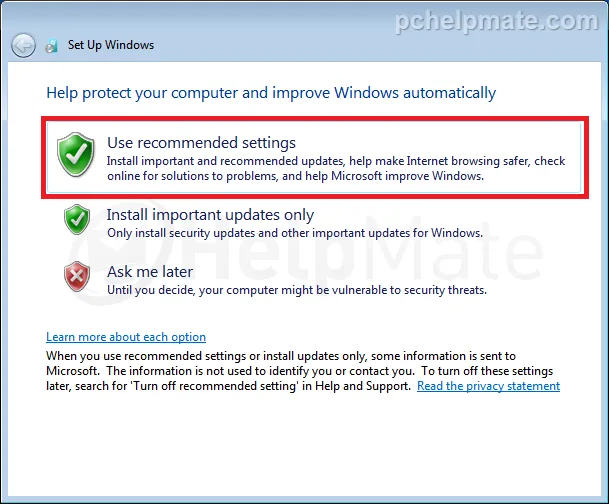
Use recommended settings.
Set your time and date.
When asked about the network, select accordingly.
Wait for the installation to complete.
And that’s it: you have successfully installed Windows 7.